We just attended our second regional burn event, called Flipside, over this past Memorial Day weekend. (These regional events were created after the original Burning Man event in Black Rock City, Nevada.) With around 2500 people, it was lots of fun even in the almost unbearable Texas heat. You may be asking, "What is a burn event?". If so, I'll get to that later in this post. I have a feeling it's going to be a long explanation. :) But, the main point right now is that we got to camp again for three nights in our
"Yurtle" with our themed camp, "Gypsy Steam Circus".
In planning for the event, I wanted to make some signage for our camp that we were sorta lacking at Myschievia, our 1st burn back in Oct. Voila! This is what I came up with:

I'll explain how I made them in a moment. Now, for explaining what a "burn" is for those not "in the know". Being so many things to so many people, it's difficult to define. But it's partly about "radical self reliance", artistic expression and being a part of a unique temporary community. I think it's best described as a temporary escape from and letting go of the "real" worlds daily stresses to live ever so briefly in the moment. Probably the toughest concept for most attendees to get their heads around is that at these events you are not allowed to sell/barter ANYTHING. The only thing you may purchase there is ice. You have to bring enough supplies to survive for what could be up to 6 days. And, if you bring it in, you have to take it back out with you, including trash (well, minus what you deposit in the port-o-potties). No commercialism or capitalism from the outside world is allowed. Everything is on a volunteer basis. Even safety and maintenance people are volunteers. They refer to what is created as a "gift economy". Everyone chips in their part to help out. And, everyone seems to have something unique and wonderful to offer whether it be food, drink, clothing, art or entertainment. These smaller regional burns may not have the population or number of art installations of the big one (at 20,000+ attendees), but it was still amazing. What we think makes it so special is all the many themed camps that gift out their own specialties to attendees. Some of our favorites were the dance floors, arts/craft stations, breakfast and probably best of all hair washings. There was even homemade popsicles in odd flavors such as Bloody Mary (with stuffed olives), Pickle Juice, and Cantaloupe. Honestly, with all the camps serving food and drink to try, we brought way too much for ourselves and our camp!
Our own camp's main contribution was to serve some of our members' specialty homemade alcoholic beverages such as "Gypsy Potion", Mead, "Johny Jump Up", "Apple pie" and Skittles Rum among other mixed drinks from our two bars. We all took turns manning the bars just as the sun started to go down each night. Before the event, some of our camp member got together and made the pair of terrific portable bars that were painted with circusy red/white stripes. We also had scheduled events throughout the weekend such as a steampunk gadget workshop, glam station with costume trunk free to all, and and an impromptu iced water gun shootout. I was blown away by all the individual talents each of our more than 25 members brought to our camp. We even had an abundance of fire spinners/eaters, belly dancers, jugglers, hoopers, drummers...really...you name it.
With a group this large, we needed a presence. We looked into having banners printed, but it was pretty costly. We had planned for a few banners at about 2x3 ft for our bar area, which would have cost us well more than $50 a banner. Yikes! My brain got to working and I figured we could make them a LOT cheaper.

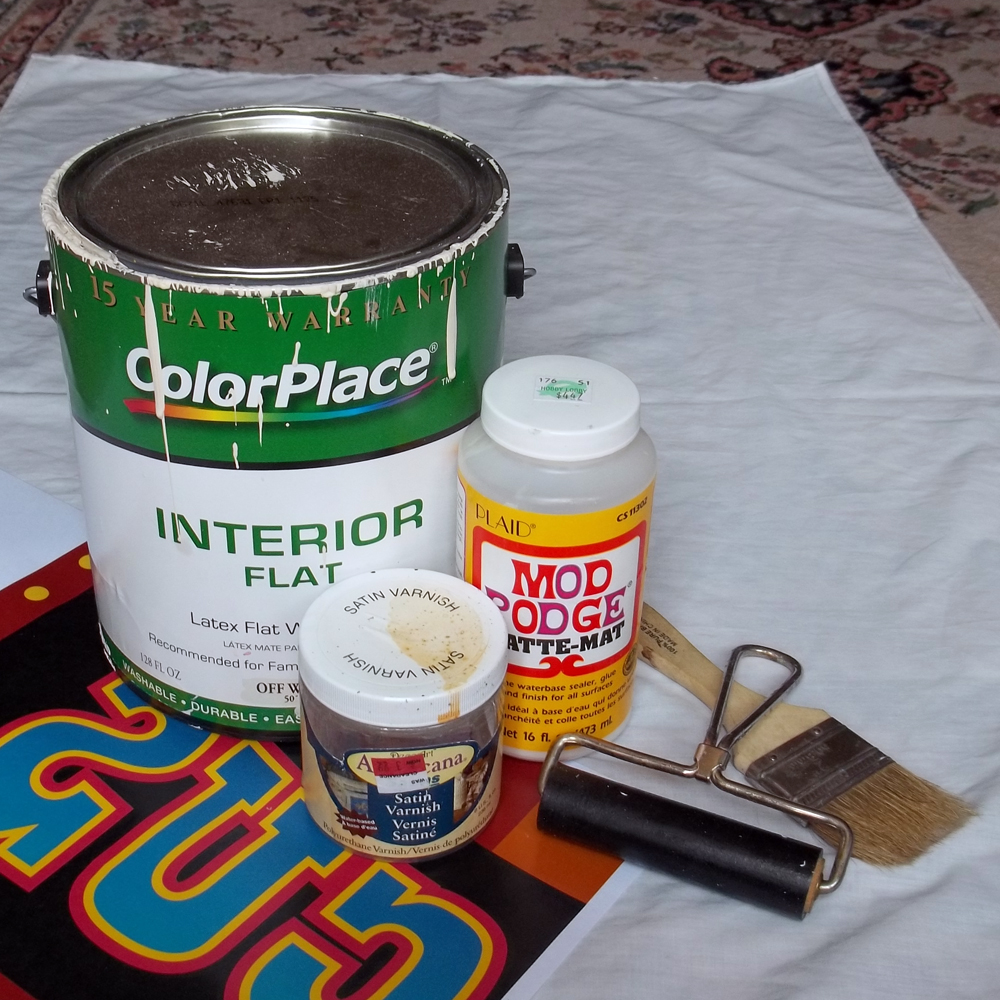
I decided to use old bed sheets for our banners. I found a few for a $1 a set at the thrift store. I ripped to size, hemmed, and primed them with latex interior paint. My original idea was to just paint the designs by hand, but that was going to be way too time consuming. So, I opted for a different quicker solution.
Now, I've transferred images with nail polish remover before. I may have mentioned this in many previous posts including the spellbook
here. But, I kept seeing posts on other craft sites and blogs about using Mod Podge or gel medium, that stuff for decoupage. My original thought was just to transfer my b/w laser copies to the sheet to be painted in with color. But, low and behold, I found out one of our camp mates works for a copy center! Ho ho! I had access to cheap color copies! Yay! I sent them files that were tiled to fit on 11x17-sized paper that I could tape together before transferring. The important part, that I almost forgot, was that I needed the image to be a mirror of the original to be legible when I was done.
So, after I primed the sheets and trimmed/taped my backward tiled image together, I glued it to the primed banner face down. Now you're probably thinking, "What?! You just screwed up you banner, man! You glued it face down?!". Or, maybe not. Anyway, this IS what you're supposed do. Once it dried, we got to work dampening the paper and rubbing it off gently so that only the image was left on the banner. Pretty cool, huh?! Yeah, I thought so. Plus, another camp mate was also a graphic designer and came up with another banner design, which we also transferred:

They were really fun and kinda stress-relieving to make. :) It took a few attempts to get all the paper off. And, some of the image did come off with it giving it a very old and weathered look. Though, after a few banners, we realized that rubbing with the grain of the paper helped to get it off cleaner while removing less image. When finished, I sealed the image with more Mod Podge and then a coat of waterbase indoor/outdoor polyurethane varnish. Here's a cost break down:
One twin bedsheet $.50
One Gallon Indoor Latex Paint (clearance) $9
Paint Brush/Roller (on hand)
Tape (on hand)
22 11x17 color copies (gifted) but would be about $11
8 oz. Mod Podge Gloss (with coupon) $3
8 oz. Waterbase Polyurethane Varnish (clearance) $4
12 1" Grommets (dollar store, not shown in the pics $1
TOTAL COST for two 2x3 ft and one sign 1.5x4.5 ft =
about $30
WAY cheaper than the printed banners, right?! And, I've probably got enough left over to make a few more, which I was going to make until all the costuming and another project stole my attention and time. I'll tell you more about that in my next post, shortly.