


I've been following an amazing youtube channel called Muggle Magic hosted by Danny. He shares Harry Potter themed tutorials/DIY's mainly focused on replica papercrafts, though he has shared other projects as well. The best part is he shares most of his stunning files for all to print and enjoy! (WB has restricted his sharing, but he still has some alterable files and does regular give-a-ways of what he makes.)
I found I just had to contacted him to inquire about doing a craft swap with my mom and I, and...I just received my box from him! Prepare to be amazed! (Sorry, it's a bit pic heavy.)

The project that really struck me was his version of the Weasleys' Wizard Wheezes Playing Cards. His attention to detail on this deck showed not only his love of Rowling's magical world, but also his knowledge of muggle card tricks and of proper poker decks construction. :) (I have found memories of my granddad teaching me a couple card tricks when I was young, so I appreciate the art.) His version of the deck not only fixed many of the mistakes made in the licensed version, but even included optional trick cards, which is something the Weasley Twins would of course had to have in theirs. He does a side-by-side comparison, if you want to see all the ways that the licensed version was goofed up. Then, Danny went and had his version professionally printed! I have collected card decks for years, and this one is my absolute favorite now. The deck shown here is the professional version we received in the swap.


Also included was a colorful copy of the replica Weasleys' Wizard Wheezes Product Catalog. Here is a pic of the cover and another inside page spread. I believe there are 12 pages including the covers. You can see the rest at his channel.

Here is a close up of the details. Believe me, they look even better in person!

Another simple astounding project he shared was a full-size replica Marauder's Map! THis is a huge undertaking! This one is also more accurate to the movie version, than the licensed Noble version which also seem to have minor errors. Frankly, this is the best version I have seen. He also did a mod of the Noble version to fix some of the issues and add to it.


I really love Danny's alternate cover hidden behind the other. This 2nd image is what Snape saw when he tried to read the map. Such a nice addition! It also includes lots of flaps hiding footprints of some of the more prominent characters and even show them in appropriate locations. He plans to add more features in the future, like pop-up staircases, etc...

If that wasn't enough for our swap box, he also included a fully readable Quibbler! The illustrations in this are amazing! So much to look at! You should definitely go check it out!

Even includes the Spectre Specs inside. :) Though, for display I may replace the glasses included with the modded version I created with ChromaDepth lenses. Will be fun to see what the glasses do to the colorful images in there. :)

Here is another surprise item we received. A Borgin and Burkes Product Catalog with all the creepy items they have available for your Dark Arts needs. :) I still can't get over the detail in these items. Again, you can see the full version on his channel.
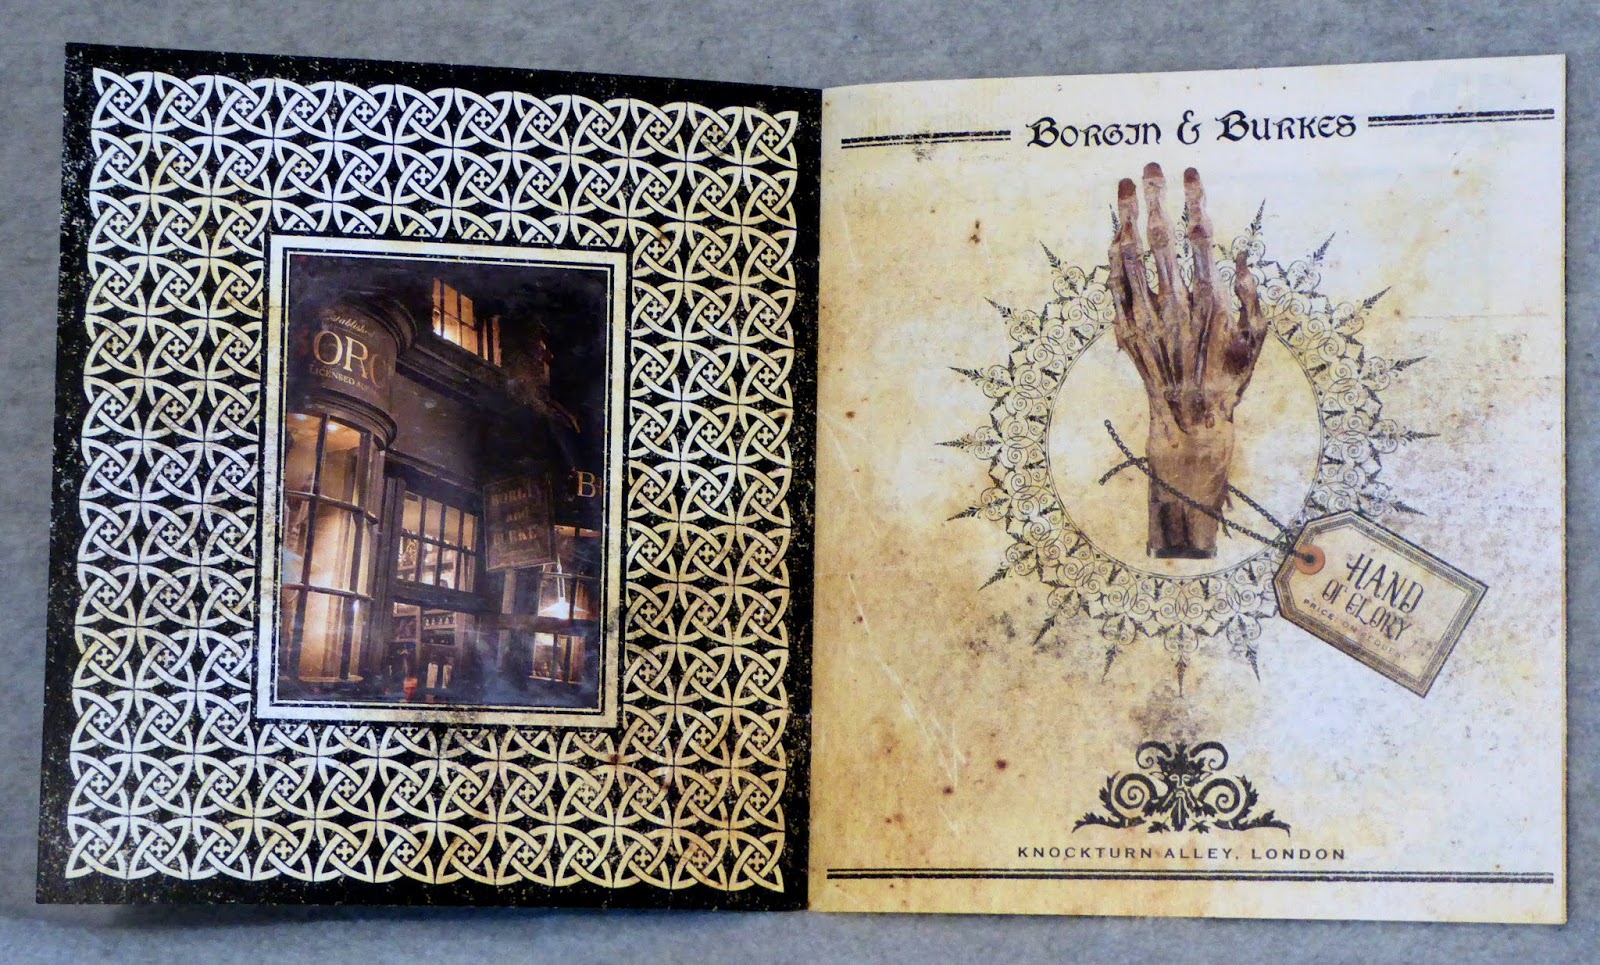
To me, the hand of glory has always been the most fascinating item in their shop. Wonder how much one of those would set me back? :)

And, being a Ravenclaw, I just adore this Hogwarts composition book alteration. Just have to keep it away from the daughter and rest of our family! LOL (I borrowed the quill and bird from the daughter for the pic.) :)


The book even includes replacement end sheets in front and back. Better get my name in there quick before someone claims it!

Just when I though I had reached the end, I also found some smaller items like a SPEW flyer, Detention Notice for Harry, Time Table, and a teeny tiny Marauder's Map hidden in the book! That Map! It's so cute!! :)
I'm so pleased with all of it. I hope Danny is equally pleased with what we sent. Can't wait to display everything proudly in our HP shelves! We sent some plush house elves and a few bits and bobs. You can view the unboxing of what I sent to him on Youtube. Or, you can check out his pics on Instagram.


